Introduction
Normally one expects around a five-year product cycle from Leica, but It’s only just over three years since the release of the M10 Monochrom and only just over a year since the release of the M11 itself. Yet we now have the Leica M11 Monochrom to tempt us.
Leica has decided that the Monochrom is important enough to bring it further forward in the product cycle, which is no surprise when you realise how popular the previous Monochrom cameras have been.
Next month it will be eleven years since the original (and still much loved) CCD-based M9 Monochrom was announced; at the time, it seemed to be an incredibly brave and risky venture, but it proved to be a great success (I still have mine and use it occasionally).
I’ve spent a little over eight months with the new Leica M11 Monochrom, which has given me time to really get to know it. Unfortunately, I did not have an M10M to compare it with, but I can’t imagine that image quality differences between the two alone will likely be the reason for an upgrade. There are, however, many other good reasons!
First of all, I’m going to look at the differences between the M11M and the M10M with respect to hardware and firmware. This was well covered in my M11 review last year, but I think it’s worth revisiting as it’s easy to forget what a big upgrade the M11 actually is, and some things have become clearer (and improved) over the past year.
After that, I will look at some comparisons with the M11 itself to try and get a handle on the advantages of the Monochrom over its colour sibling. I will examine detail and high-ISO performance together with a quick look at the colour response (including a short comparison to the original M9 Monochrom).
Finally, I’ll have a look at the changes in FOTOS, which make it so much more satisfying to use with the M11 cameras.
Hardware changes from M10M
Let’s start by looking at what Leica has changed with the M11 (and there is a lot!).
The Body
Superficially, the M11M looks very much like the M10M; the dimensions are identical, and everything appears to be in the same place. However, a closer examination shows a lot of differences.
First of all, there is no base plate. This has proved quite an emotional issue for lots of M users — indeed, some have not upgraded to the M11 because of it.
The base of the M11M holds a battery (and battery release switch, which is the same design as that on the SL2 and Q2 cameras). The battery, however, is different. More about that later.
New button layout
The M11M has three buttons to the left of the LCD, like the M10M, but they have been changed to Play / Fn / Menu options like the SL2 and the Q2, The Fn key defaults to turning on and off Live View, but it can be configured to any other function as desired.
The rear plate has been tidied up a bit — the buttons are now separate from the LCD, and the LCD is flush with the top plate and base of the camera.
The front configurable button on the M10 has gone, but there is a new button on the top plate (in the position of the Video button on the M(240). Like the Fn (above), this button can be configured to default to any particular menu option (I have it set to magnification like the old front button on the M10).
The third function button is accessed by a press of the rear thumbwheel: A short press of either of the Fn buttons will bring up the last-selected menu option. A long press brings up the menu of available menu options; if you choose this, then it will be used as the default next time. The thumbwheel itself can be set either to Focus Assist or to Exposure Compensation.
The four-way rocker switch hasn’t changed but is now used only for navigation and confirmation. Pressing the central button doesn’t bring up the status screen as it did in the M10, as all the status information is now included on the Quick Menu screen.
To summarise, there are now three function buttons, each of which can be configured as desired, and the thumbwheel can be used in the same way as the M10. I’ll go into the Menu options in more detail later on.
The finish
The New M11M comes with a black-paint finish over an aluminium top plate. The new black paint is a modern solution and kinder to the environment.
The camera is also a whole 20 per cent lighter than it would be with a brass top plate. This is quite a significant difference and will be relevant to many buyers. Personally, I would rather it was brass, but that’s just me!
After almost two years with my M11 (with the same paint), I can report that the finish is incredibly tough. There have been trips to sandy beaches in Crete and the Canaries, and there have been rainstorms in the UK. The finish only shows signs of being slightly shiny on the corners (with the same treatment, the SL2 and my Q2 Mono looked decidedly used, with worn corners and many bright points). I’ve been using a shoulder strap which rubs against the camera all the time (with no protector), and there is little sign of wear on the paint above the strap lugs. What’s more, the black finish is more ‘grippy’ than either the chrome or the old black finishes.
The M11M also loses the red dot and replaces it with a screw. “Monochrom” is engraved on the top plate but is not filled in, and the A on the ISO dial is grey. The back plate has “Leica Camera Wetzlar – Made in Germany” engraved, also unpainted. All very tasteful and stealthy. As far as I can see, the finish on my seven-month-old Monochrom is the same as the day it arrived last September.
New battery
One of the obvious shortcomings of the M10 was the battery life, especially when using the EVF. The new battery for the M11 is properly weather-sealed and fits into the base of the camera in the same way as the Q2 and SL2 battery (with a similar latch mechanism).
It would have been good if the new camera had used the same battery as the Q/SL, but in that case, they would have had to have a new compartment to hold the SD card, and as always with the M cameras, space is at a premium.
So the new battery leaves room for an SD card slot on one side of it, the only downside being that the release lever is obscured when the camera is mounted on a tripod. It would have been nicer if you could have changed the battery or card without taking the camera off the tripod. On the other hand, with the greatly improved battery life and the internal memory, perhaps that isn’t quite so relevant.

Leica M11M ISO 125 1/320th f5.6 75mm APO Summicron Asph
The battery life is a huge improvement (CIPA suggests 700 images per charge), On occasions with the M10, I’ve used three batteries in a day, but on the M11, I’ve only once exhausted a battery in a day’s shooting (a wedding), even with the camera switched on, the power saving switched off, and using the EVF full time.
256 GB high-speed internal memory
The internal memory is an alternative to a second SD card slot (and presumably takes up less space). The M11M has 256 GB, unlike the M11, which has only 64 GB.
If, like me, you are prone to grab a dog and a camera and head out into the world, only to find that you left your SD card in your computer, then the internal memory is a real bonus. The only downside is that you have to connect to the camera via the USB cable to get files from it, or copy files from the Internal memory to an SD card (which is simple and works better).
You can choose various ways to handle the INT storage together with an SD card:
- SD first (uses SD until full, then INT)
- Backup (writes files to both together)
- Split (DNG on INT jpg on SD)
- SD Only
- INT first (uses INT until full, then SD)
- Split (jpg on INT, DNG on SD)
The internal memory is extremely fast. In my tests, it is slightly faster than a SanDisk 128Gb Extreme Pro 300mb/s UHS-II SDXC for short bursts and about 20 per cent faster for extended shooting.
It would be nice if the Internal memory could be configured as Mass Storage, but PTP is the only available option. However, with a USB-C cable connected to my MacBook Pro, Lightroom reads the internal memory well, it’s a little slow, but it does work. It’s worth noting that PTP will also read the SD card, so it will show duplicates if you’ve been using the Internal Memory as a backup. Lightroom shows images for both SD and Int, so you can choose what you want; by default, it doesn’t tick two identical files.
When the M11 first appeared, I felt that it would have been better to have two SD card slots, but increasingly I think this is a better option, especially with the extended internal memory of the Monochrom.
High-speed shooting and the buffer
The camera also has a 3 GB buffer, which is enough for 15 DNG images and as many as 100 JPG images. There are two high-speed shooting modes, one at three frames per second and the other at 4.5
New Maestro processor
The M11M has the Maestro III processor, which is used in the SL2 and the Q2 (and the M11) to allow much faster processing and better power consumption.
60 MP Sensor
The M11M has the same 60 MP Back Side Illuminated (BSI) CMOS sensor as the M11. However, without the colour filter array, this provides a real improvement in ISO sensitivity, dynamic range and noise performance. The base ISO is 125 (as opposed to 64 in the M11).
Full-time off-sensor metering
All previous M cameras with built-in metering (with the exception of the M5) have metered off the shutter curtain. The M240 and M10 also metered off the sensor in Live View.
The M11 has dispensed with metering off the shutter curtain, and now metering is via the sensor only. This has the advantage that the metering is much more accurate (with multi-point, centre-weighted, spot and highlight-weighted metering options).
Electronic shutter
With the M11, like the SL2, you can choose
- Mechanical
- Hybrid
- Electronic shutter
With the mechanical shutter, you have the same limit of 1/4000s as the M10. Hybrid uses the electronic shutter when the speed required is over 1/4000s. Electronic uses electronic shutter at all speeds. The Electronic shutter goes up to 1/16000s.
The electronic shutter is fantastic for using fast lenses in bright light but not for capturing sports or fast-moving action. The readout on the electronic shutter takes about 1/10th second (CMOS sensors read line by line). This means that if objects are moving fast through the frame then you get tilted verticals.
It isn’t good for shooting in artificial light either, the slow readout means you will get banding in most light situations.
However, for static or slow movement, when you want to shoot wide open in bright light it’s a real asset. The issues relating to slow readout are found in many cameras with progressive electronic shutters (think Sony A7R IV and V). The Global Shutter found in the Sony A1 solves this problem at the expense of some image quality.
Worth noting is that if you have set the camera to electronic shutter and you want to select shutter speeds above 1/4000s, then you need to set the shutter speed dial to B, and you can then select the desired shutter speed in the menu.
I’ve found that it’s best to set the camera to hybrid shutter. That way, it uses the mechanical shutter up to 1/4000s and the electronic shutter beyond that. This avoids problems related to the slow readout of the electronic shutter.
USB-C connector
The camera has a USB-C connector on the base at the extreme right (looking from the back). Not such a big deal, you might think, but actually, this is a real game changer. I will discuss this at length later on in the article (in Cables and Compatibility and also in the FOTOS section).
Enough now to say that it works really well for charging the camera (and quickly) and also for connectivity to a computer, tablet or phone. There is no cover for it (just as there isn’t in most modern phones), but it is weather-sealed, and dust doesn’t seem to be a problem.
To connect to an iOS device with a lightning port you’ll need Leica’s special MFI-compliant cable. To connect to most other devices, a USB-C to USB-C cable works fine, although I found difficulty connecting with an Apple USB-C Thunderbolt 3 cable. All USB-C cables are not made the same! My feeling is that the M11 is less fussy than some of the other devices I’ve tried to attach. Having said that, despite what it says in FOTOS, the WiFi is about twice the speed of the Leica MFI-compliant cable.
The new external EVF
The new Visoflex 2 EVF is a 3.7Mp OLED display, which sounds very much like that in the Q2, and certainly feels that good.
It’s very nicely made out of metal, tiltable, with magnets to stop it from tilting when you don’t want it to. It has clear and useful detents at 45 and 90 degrees.
It suits the camera really well, flush with the body at the front, and although it’s bulky, it’s not as tall as the previous EVF, which means it fits better in your bag. The hot shoe connection is much more positive as well, making it less likely to fall off. Mind you, a lock would have been nice!
There is still some ‘blackout’ after shooting, so it isn’t quite so good for continuous shooting as the Q2.
Comparing it to the previous EVF on my M10-R, the image is much larger, brighter, and more detailed.
In this case, the proof is in the use. With my M10, I almost never used the EVF, but with the M11, I’ve used it extensively. I think those who are lucky enough to have Noctiluxes will also be very happy with it.
The new EVF also works with all M10 variants. However, the image is ‘cropped’, and I didn’t find it much of an improvement over the original Visoflex.
Software changes from M10M
Variable-sized DNG files
This is an interesting idea, and I’m unaware of any other company doing the same thing. This is not a crop, it’s a full-frame image, but with a lower Megapixel count. You can choose the full 60, 36 or 18MP. They use Pixel Binning to achieve this.
Three different sizes
- 60mp 9504 x 6320
- 36mp 7416 x 4928
- 18mp 5272 x 3498
I’ve done some pretty careful test comparisons of the different image sizes, and although there is an improvement in noise levels with the lower pixel counts (as you might hope for), reducing a 60MP image in post-processing software has a similar effect.
On the other hand, I am always reading about people who don’t want the increased storage space of higher MP files, and this gives you the best of both worlds in that you have the opportunity of more pixels, but you can shoot at lower pixel rates for less important shoots or when storage is at a premium.
If you shoot DNG+ lower resolution JPG files, the JPG files also have the lower resolution.
Digital zoom (crop mode)
This works the same way as on the Q and Q2, and you need to use it in conjunction with the rear screen or the EVF.
- Off – 9504 x 6320 (60mp)
- 1.3x crop – 7680 x 5104 (39mp)
- 1.8x crop – 5248 x 3472 (18mp)
This can either be chosen through the menu, or it can be allocated to one of the function buttons: You choose 1.3 crop or 1.8 crop, and Live View frame lines are brought up separately for each crop, while the EVF/LCD still shows the entire sensor.
If you are shooting with a 28mm lens, that equates to approximately 36mm and 50mm, with a 35mm lens it will be approximately 45mm and 64mm etc. The EVF only shows the frame line for the chosen crop (1.3 or 1.8)
The DNG file shows as cropped in Lightroom: Using the crop tool will show the whole image with the crop lines. (Again, just as it does in the Q2)
If you have selected a lower-resolution DNG or JPG file and then you choose Digital Zoom the camera will revert to full-sized DNG/JPG (quite right as well).
Changed Menu System
The Menu system in the M11M (like the M11) has been changed considerably to make it similar to the menus in the SL2 and Q2. This might not be to everyone’s taste, but it has to make sense. I’m certainly grateful, as it makes event shooting with the M11 and the SL2 much simpler.
Pressing the Menu button once brings up a touch screen quick menu just like that on the SL2 and Q2. Pressing it twice takes you to the Favourites menu with items which can be switched off and on in the Customise Control / Edit Favourites. If nothing is chosen then the Favourites menu is omitted, and the second press of the menu button takes you to the menus themselves.
With the M10, I found the Favourites very useful, but with the M11, the quick menu really has everything that I need quickly, and the main menus are better organised than they are in the M10 (this is pretty subjective stuff, but I like them better).
The Quick Menu screen replaces the old status screen, which was raised by pressing the centre button of the four-way controller on the M10 (this now only acts as an OK button for menu selections and changing the information in the Play mode.)
The Lens Detection menu is much improved, with an option to ‘Edit list of M lenses’ and also ‘Edit List of R lenses’. When you choose this, the list presents all the lenses just as it did with the M10, but now you can switch lenses off and on. This means that if you have just a couple of uncoded lenses when you choose Manual M you are presented with those lenses (with Edit List at the bottom). For example, my list looks like this:
- 35 f1.4 11869/11870/11860
- 90 f2.8 11807/11808
- 50 f1.4 11868/11856/11114
- Edit list of M lenses
As before, it remembers the last uncoded lens used and uses that as the default.
Things worth talking about
Startup time and power settings
I’ve compared the startup/wakeup times to that of the M10 as best as I can. If you are using Live View, then the image comes up on the LCD / EVF on the M10M about 1/2 second more quickly than on the M11. On the other hand, with Live View switched off on both cameras, if you hold down the shutter and switch on the camera, then the M11 takes an image about 1/2 second before the M10.
However, the greatly improved battery life on the M11 proves to be a real lifesaver here. Under Menu / Camera Settings / Power saver mode, I have Camera Standby set to Off and Display Standby set to 30 seconds.
This works very well, wake-up is almost instant, and the battery doesn’t drain fast if you aren’t shooting, even with the EVF attached (unlike the M10, where the EVF seemed to drain the battery incredibly fast). In fact, even enabling Geotagging in FOTOS in Performance Mode doesn’t seem to drain the battery very much.
I’ve only once managed to drain a battery in less than a day (and that was shooting a wedding), and still I only used one battery, a quick boost via the USB-C socket and a power brick fixed it for the rest of the day.
Full-time exposure metering and shutter lag
The shutter lag using the M10 with Live View was noticeable and significantly longer than with Live View turned off (because of the need to close the shutter before opening it for the exposure).
The M11M is effectively in Live View all the time (even if the EVF and LCD are turned off). This means that the shutter must first close before opening it for the exposure (just like the M10 in Live View).
I wanted to find out whether the M11 suffered from shutter lag the same way as the M10 with Live view, but it’s hard to measure shutter lag! In the end, I devised an experiment to measure the difference in shutter lag between the two cameras (rather than measuring the actual shutter lag, which needs specialised equipment).
What I found was that the shutter lag on the M11M was effectively the same as that on the M10 with Live View switched off and much less than the M10 with Live View switched on, which is good news.
Shutter noise
The downside of the full-time exposure metering is the shutter noise, which is noticeably louder than that of the M10M; worse than that, it’s rather complicated sounding compared to the elegant click of the M10M, M10P and M10R. Leica did such a wonderful job damping the shutter in the M10P. The only real downside of the M11 and M11M is that this has been spoiled
Can Leica lenses ‘resolve 60 MP’
I wonder how many times this question will be asked. I’ve resorted to help from the wonderful Roger Cicala at Lens Rentals for this (not because I couldn’t say it myself, but because he says it so beautifully and so convincingly).
Roger’s article “More Ultra High-Resolution MTF Experiments” can be found here.
But in this context, the real point is his appendix “Why Megapixels are Stupid”, where he points out that:
Camera MTF Lens MTF = System MTF
What that means is that however bad the lens might be, its performance will still be improved by using a better camera (and vice versa).
Using the M11M will improve your results from vintage glass just as it does with modern APO lenses. Of course, the lack of a Bayer colour filter means that the M11M will improve image quality even more than the M11.
Tough (oh yes) (don’t do this at home!)
When I test cameras, that is just what I do; they don’t get babied because that isn’t the point. On the other hand, generally speaking, I don’t test them by dropping them from more than a meter (say 4ft) from the back of our van onto a tarmac road; it just doesn’t seem fair. More than this, I don’t do it when my own personal 35 APO Summicron is attached!
Except that’s exactly what I did. My backpack tipped over, the top opened, and the camera dropped out… it rolled off down the road. I don’t think I need to explain the pain that this caused me. I can feel hundreds of Leica users cringe as they read this.
My M11 now has a small chip on the corner of the top plate and a scuff on the ISO dial (which still works perfectly). This was from where it actually hit the road, there are no marks on the paintwork from where it rolled (just a bright mark and a ding on the lens cap for the 35 APO). Of course, I was lucky, but still, it shows that the camera is tough; indeed, I feel that the removal of the base plate has probably made the camera more rigid and resilient.
This was over a year ago now and with the M11 rather than the M11M, which, over the last eight months, has been on long dusty walks in Crete and the Canaries, and wet ones in Cornwall. I’ve managed to avoid dropping it, and to be honest, it might as well be described as mint condition!
The Christmas before last, I was given a splendid modern waterproof jacket, and we went off to the Suffolk Coast to test it out on a particularly nasty winter morning. It wasn’t raining much to start with, but after 2-1/2 hours, when we got back to the van I found that the jacket had actually become pretty waterlogged (so much for 100% waterproof!). I simply hadn’t realised how bad the weather was. I was shooting with the M11, which had either been over my shoulder or in my hands (I took many photos, it’s an atmospheric place). It had been switched on for the entire time.
When we got home, I dried off the outside of the camera (which was very wet). I then checked the battery/SD compartment and the lens mount, and everything was completely dry. My coat was waterlogged and weighed almost a kilo more than it did when we started!
Of course, you shouldn’t try this (and I didn’t mean to), but I think this shows that the M11 and M11M are really tough – really, really tough.
Changes summarised
Superficially, the M11M looks like an M10M with higher resolution, but actually, it’s quite a revolution in terms of image quality, connectivity and functionality. To sum up:
- New base improves weather sealing and strength
- New black paint option is very resilient with a grippy finish.
- The aluminium top plate makes it the weight of an M6.
- Sapphire Crystal LCD cover (very scratch resistant)
- Button layout is now the same as the SL2 and Q2
- Three new programmable function buttons (Fn, top-plate, thumbwheel)
- New battery with 700 shot CIPA standard (this has proved modest)
- 256GB of very fast internal memory
- Brand new and faster Maestro III processor
- New monochrome 60MP BSI CMOS sensor with excellent dynamic range
- Full-time off-sensor metering (much more accurate, no extra shutter lag)
- Electronic Shutter (up to 1/16,000 sec)
- USB-C Charging,
- PTP and Apple MFI connectivity using USB-C port
- Direct connection from camera to Lightroom via USB-C cable
- Improved FOTOS app allowing filtering selections
- Tethering via FOTOS app
- Geotagging via FOTOS app
- New well-constructed EVF with a bigger and brighter image (like Q2)
- LCD Display with double the pixel count of the M10
- Image stabilised monitor on the EVF and LCD (not the sensor!)
- Combined Quick Menu and status screen
- Menus changed to be even more comparable with Q2 and SL2
- Improved menu system for uncoded M lenses
- Digital Zoom mode with framelines for 1.3 and 1.8 crops
- Variable DNG size (18.4 MP, 36.5 MP and 60.3 MP)
Specific M11M advantages over the M11 are:
- Sapphire Crystal LCD cover (rather than toughened glass)
- 256GB of very fast internal memory (as opposed to 64GB)
- Unobtrusive design without red dot or logo
- Absence of a Bayer colour filter improves noise performance, ISO sensitivity and monochrome tonality.
Image quality compared to the M11
Sadly I didn’t have an M10 Monochrom to compare with the new camera. However, Sean Reid did have one and has done some detailed comparisons. His is a pay site, but it’s well worth the price of entry, and once you’re in, there are no ads. If you are considering upgrading from the M10M and you would like to see some direct comparisons between the M11 Monochrom and the M10 Monochrom, then head over to reidreviews.com.
The Leica Monochrom cameras dispense with the Bayer colour filter and also with the demosaicing algorithms, which use groups of four colour-filtered pixels (two green, one red and one blue) to generate colour from the CMOS sensor (which is only sensitive to light intensity and not colour). Theoretically, you might expect four times better resolution, but modern demosaicing algorithms are good, so the resolution change isn’t that dramatic.
When the M9 Monochrom arrived it was pretty clear that the lack of a Bayer filter made a significant, visible and useful difference to the 18MP resolution of the M9 with the Bayer filter, perhaps twice as good resolution in real terms.
Since that time, processors have improved dramatically, allowing more sophisticated demosaicing routines to generate colour images, so the advantages of a Monochrom sensor are probably not quite so significant. Added to that, the M11 has 60MP, and even if the Monochrom represented a doubling in resolution, that might be significant only for very, very large prints.
The other effect of removing the Bayer filter is to increase the base ISO of the camera because more light reaches the sensor. Typically the base ISO of Leica Monochrom cameras is twice that of their colour partner. Of course, this also affects the noise levels at high ISO.
Resolution
The M11 is so good at high ISO, and the black and white conversions are lovely, so I wanted to look at these aspects and see how much of an advantage the M11 Monochrom provided.
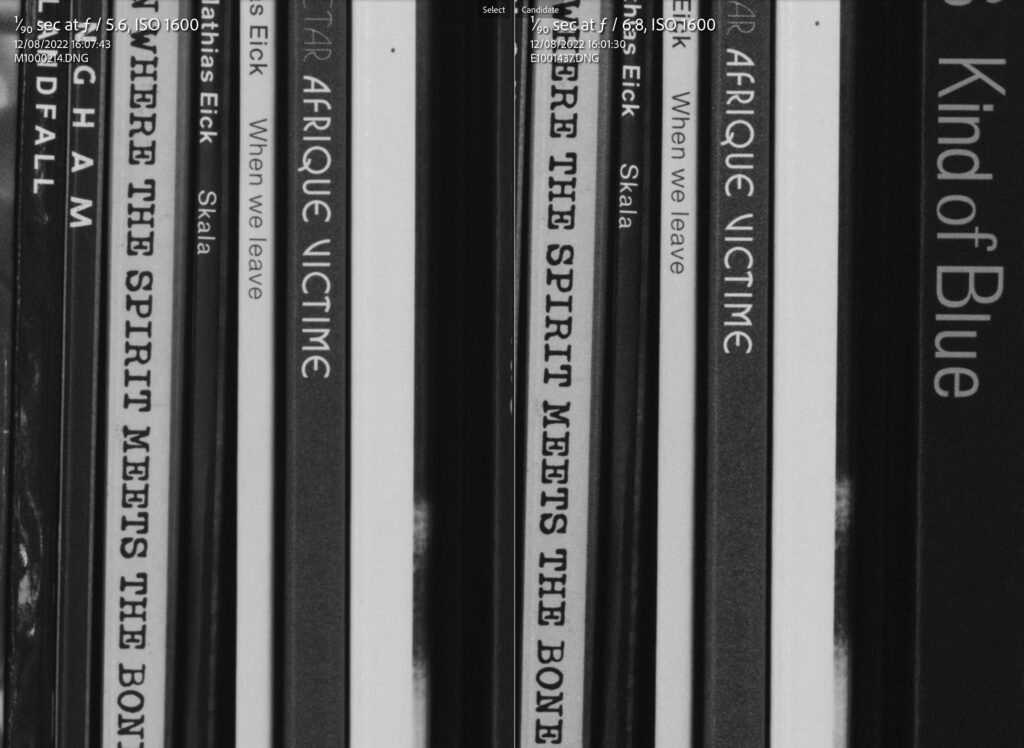
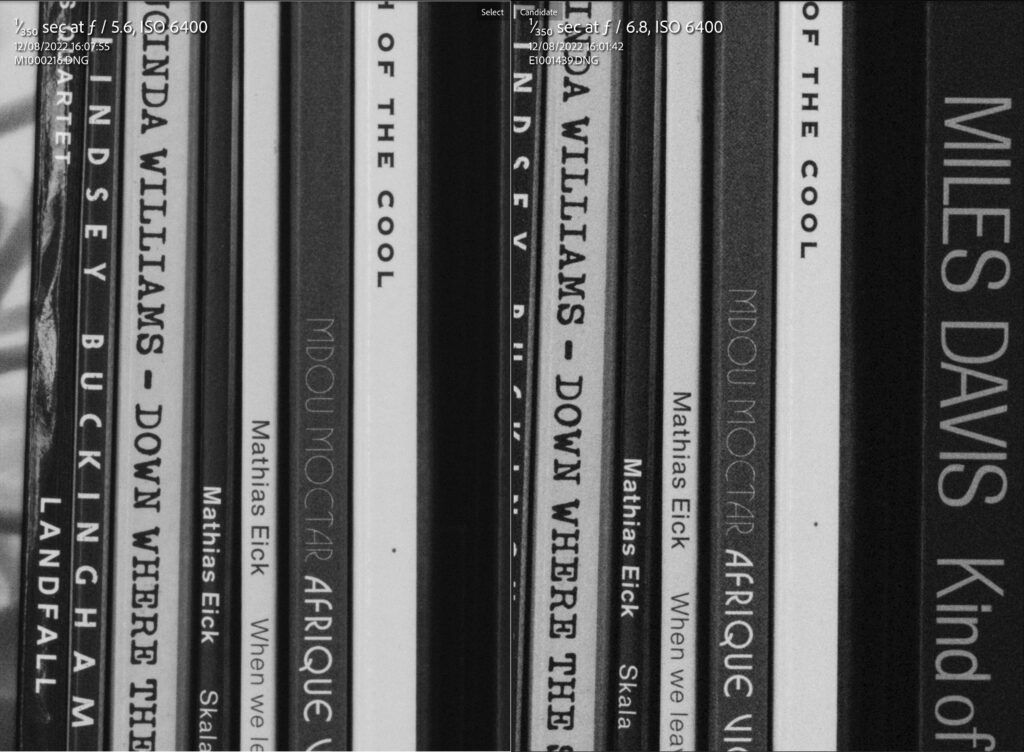
These tests were all done on a tripod in intentionally poor light indoors but using natural light from a window. I used straight black and white conversions in LR from the M11 colour files (and there is some difference between the ‘colour’ of the M11 and M11M – look at the 200 ISO comparison.
I’m not going to post hundreds of images here, but my conclusion is that although there is more detail in the M11M files at base ISO, it would have to be an extremely critical application where this difference was relevant, even in very big prints.
In these cases, the M11Mono is on the left
M11M vs M11 at base ISO.jpg
High ISO
By 1600 ISO the differences are becoming more obvious, and by 64,000 the difference between the M11M and the M11 is quite startling.
At 6,400 ISO
By 50,000 ISO, the Monochrom files are still quite usable, whereas the M11 files are verging on unusable.
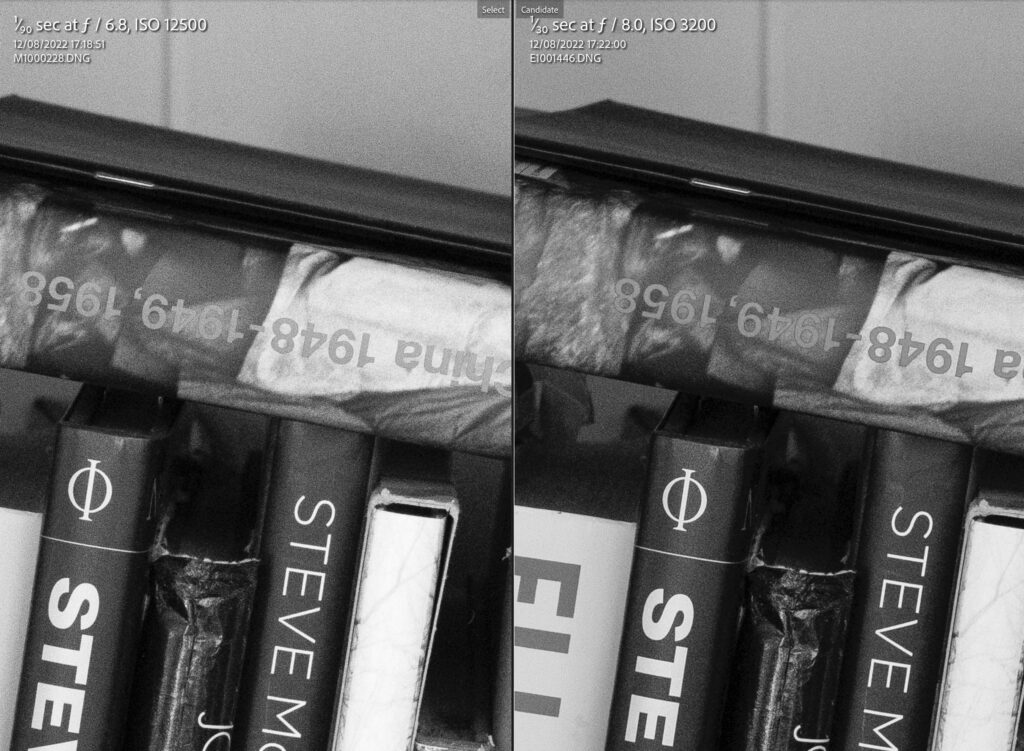
A comparison of the Monochrom at 12,500 with the M11 at 3,200 seems to me to suggest that the Monochrom has around a two-stop advantage at higher ISO, which is pretty significant if you’re shooting in very low light.
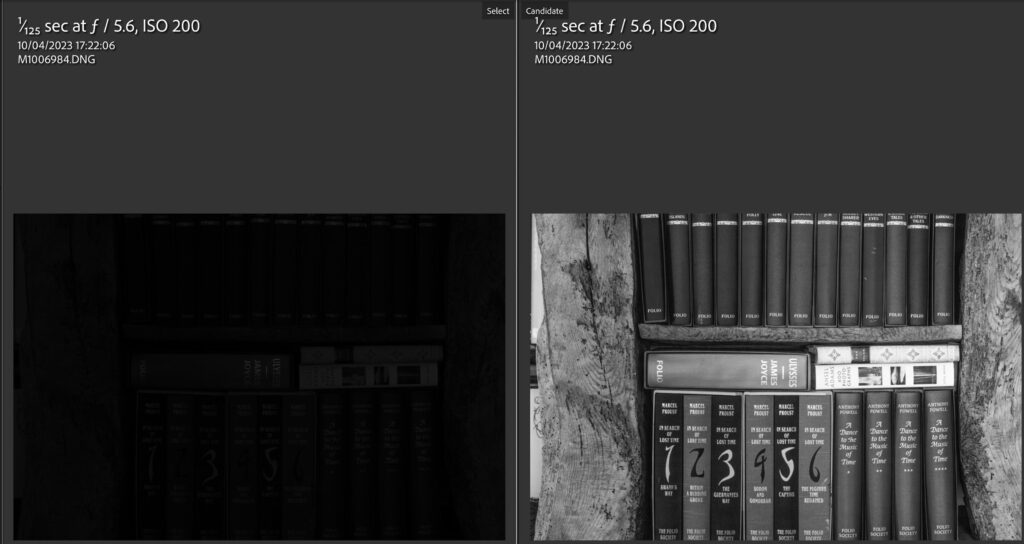
What’s more, the dynamic range on the Monochrom sensor is incredible. As long as you are careful not to overexpose, you can get good detail out of areas which superficially look completely under-exposed.
In this instance, the image was under-exposed by about 6 or 7 stops (Lightroom only allows a 5-stop exposure increase). Here it is +5 stops
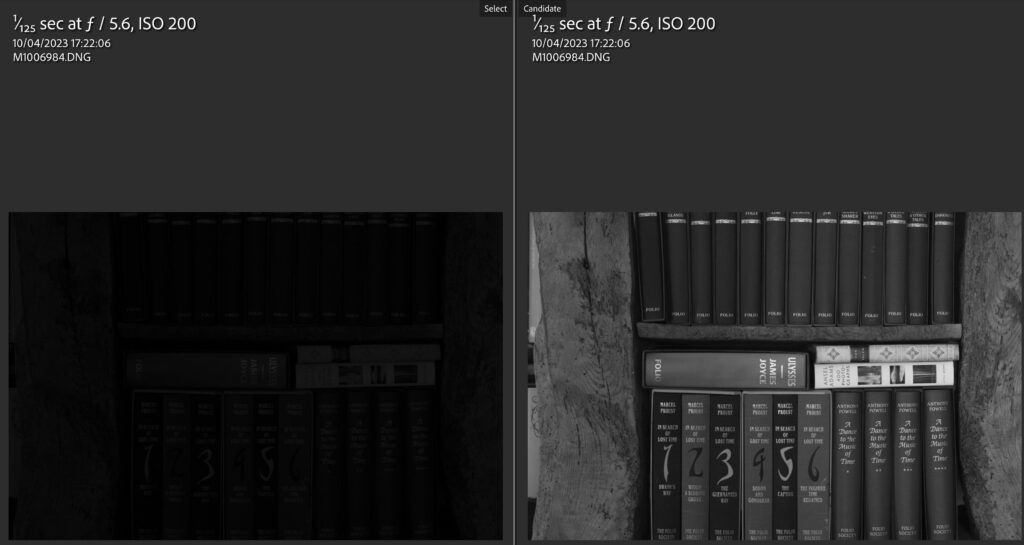
Here is the finished comparison (with a little contrast and shadow lifting)
Spectral response
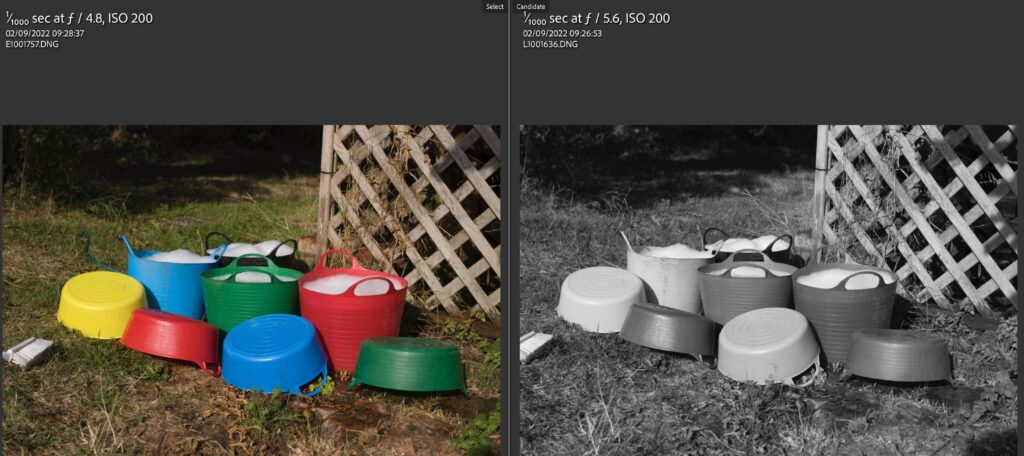
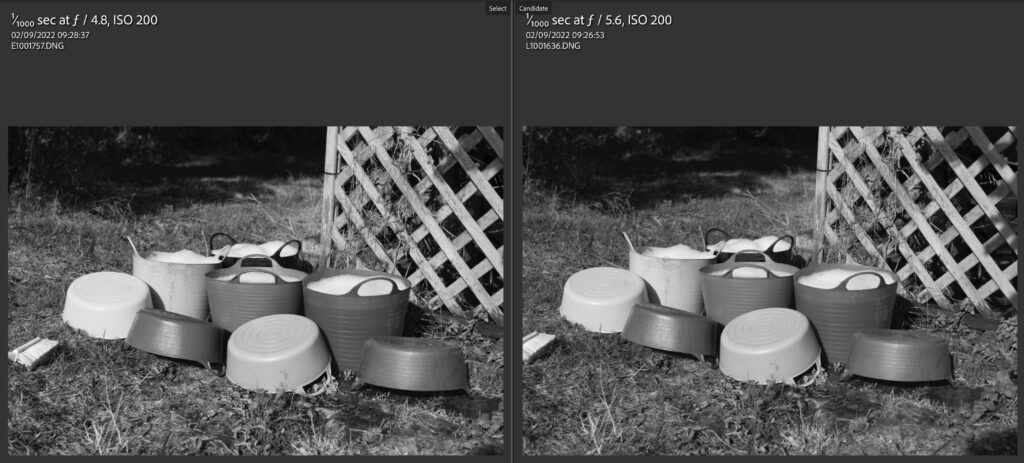
Having noticed that there was some difference in the grey shades of the standard Lightroom black-and-white conversion, I thought it would be worth having a look into this, so I requisitioned a set of coloured buckets from the ponies; these proved to be a perfect sample.
Here is the difference between the M11 and the M11M when first imported. Just to keep you on your toes, in these images, the M11Mono is on the right!
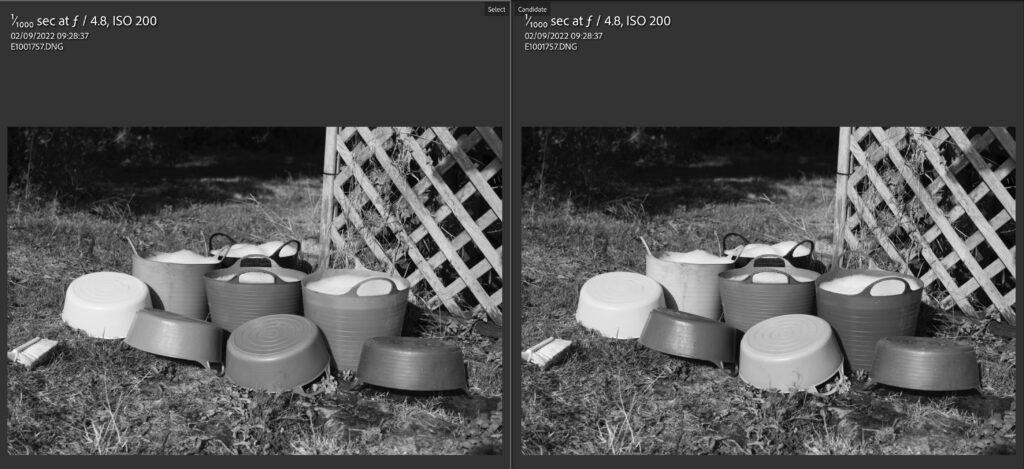
Here is the difference with the M11 converted using the straight Lightroom preset
Here is the closest I could get using the channel mixer to convert the M11 image
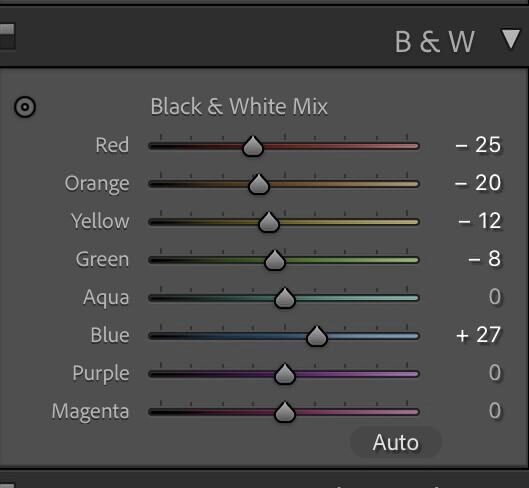
Finally, here is the colour channel setting in Lightroom, which got the closest.
I’m not sure that this has very much significance in real life, but it does suggest that the blue channel is boosted a bit in the M11M.
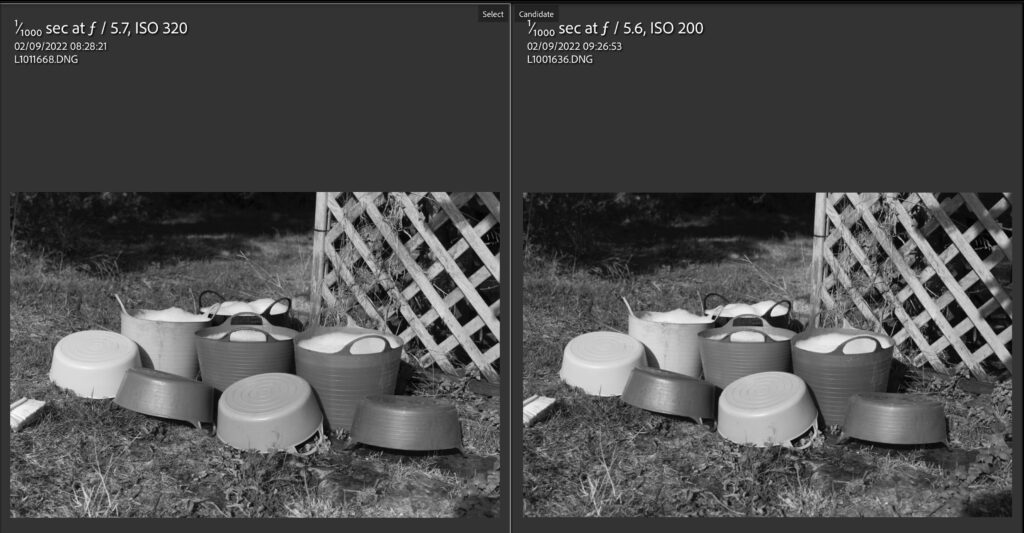
I thought it might be fun to do a comparison between the M11M and the M9 Monochrom just to see if they behave the same way
You can see here that the old M9 CCD doesn’t boost the blue channel as much as the new M11 Monochrom.
I’m not sure how significant these differences are, but it’s worth being aware of them. Clearly, they are a result of the lack of a colour filter array. Of course, you can change this by adding colour filters to the front of the lenses.
Leica FOTOS and the M11M
MFI compatibility means that the M11 was the first Leica camera to be accredited by Apple to be compatible with iOS for both the iPhone and the iPad. This means that there is much better GPS tagging using low-power Bluetooth via FOTOS.
The M11M currently has the fastest WiFi file transfer to FOTOS v3.2 of any Leica camera. FOTOS allows connecting both by cable and by WiFi, and you can now filter selections by Favourites, and File Type, Downloaded / Not Downloaded. It works very well, especially using WiFi. As of now, the cable is not nearly as fast.
Downloaded images can be transferred directly to Lightroom Mobile.
Remote control and ‘tethering’ both work with the M11M, especially with WiFi.
In conjunction with the low-power Bluetooth and FOTOS, Geotagging now works really well with the M11M (and M11). Although you mustn’t ‘unload’ FOTOS on your phone, it doesn’t need to have focus.
But why black and white?
I think there are three important answers to this question.
If you always shoot black and white. In this case, it seems obvious to shoot with a monochrome camera and get the best possible image quality for the sensor size.
If you want the best possible quality of images from a 35mm sensor. Indeed it could be argued that the quality of the files from the 60MP Monochrom is equivalent to 100 MP medium format cameras with a Bayer filter.
If you want the discipline that shooting with a black-and-white camera imposes on the photographer. Shooting with a black and white camera encourages you to ‘think’ black and white.
Conclusion
Sadly I haven’t been able to do direct comparisons with the M10M, but my instinct is that if image quality is your only concern, and you already have the M10 Monochrom, then you won’t want to upgrade unless you need the high ISO characteristics of the M11 Monochrom.
Indeed, I talk to quite a lot of people who feel that the M10 family is the last ‘real’ M and that the loss of the baseplate is the last straw. But I suspect they haven’t spent much time with an M11.
Writing this article has made me realise how good the M11M really is, and some of the features which weren’t quite working when the M11 was released are working now (and are also working for the M11).
The advantages of the M11 are so many and so obvious, principally in terms of battery life and the new sensor, the electronic shutter and connectivity with FOTOS.
The M11 Monochrom is a wonderful camera. I’ve listed 26 improvements above, and I’m sure I haven’t thought of them all.
If you always take black and white images, or if you have projects which are black and white, then the Leica M11 Monochrom is quite simply the best option available to you, providing both an excellent shooting experience and peerless image quality.
Leica was incredibly brave to announce the M9 Monochrom back in 2012. That bravery has paid off, and this is the latest in a line of excellent cameras. I hope that the company will come up with an even better camera in another five years or so, but in the meantime, this one is quite a triumph.
The Images
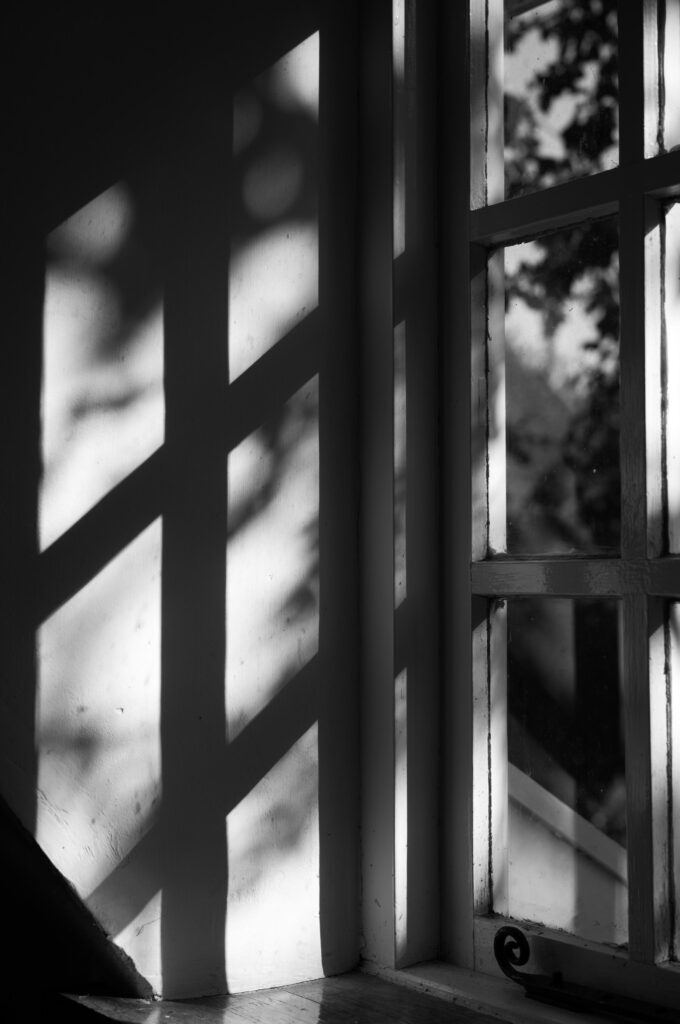
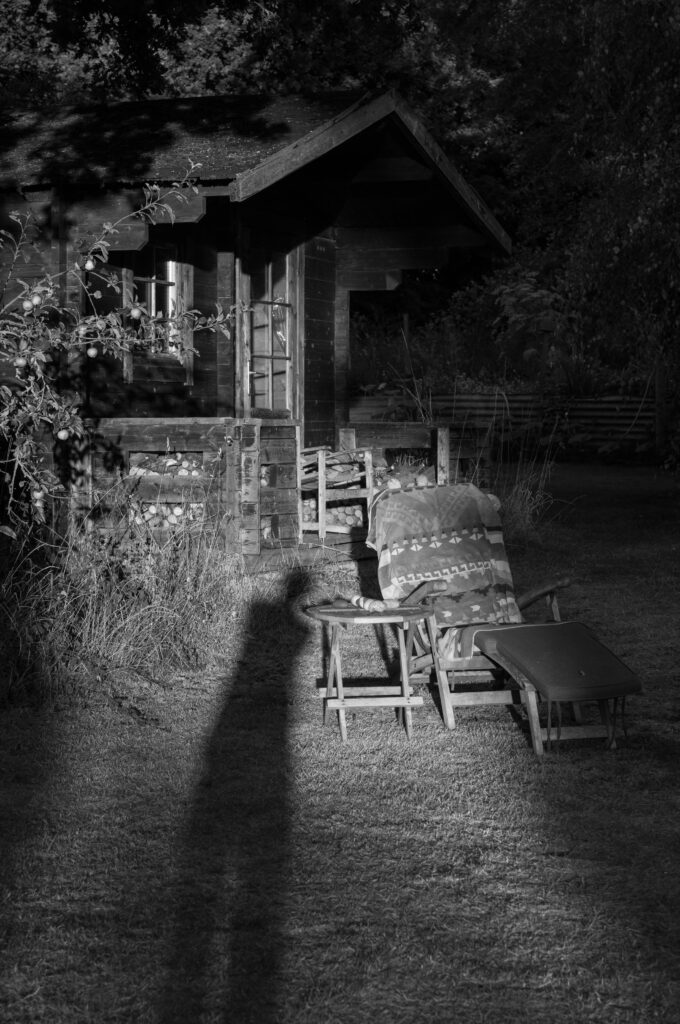
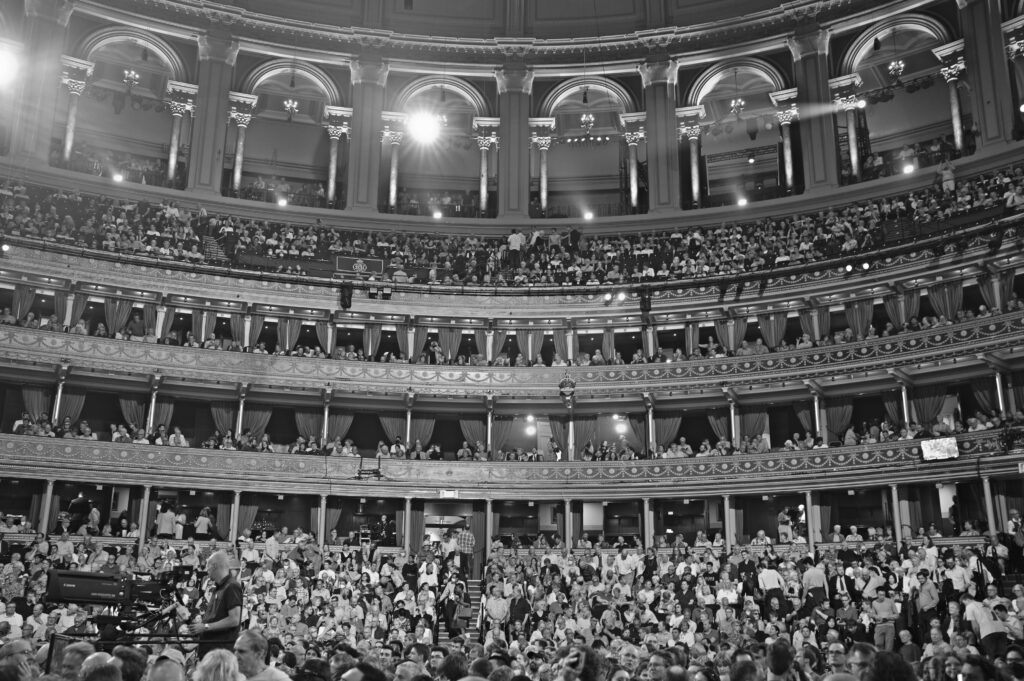
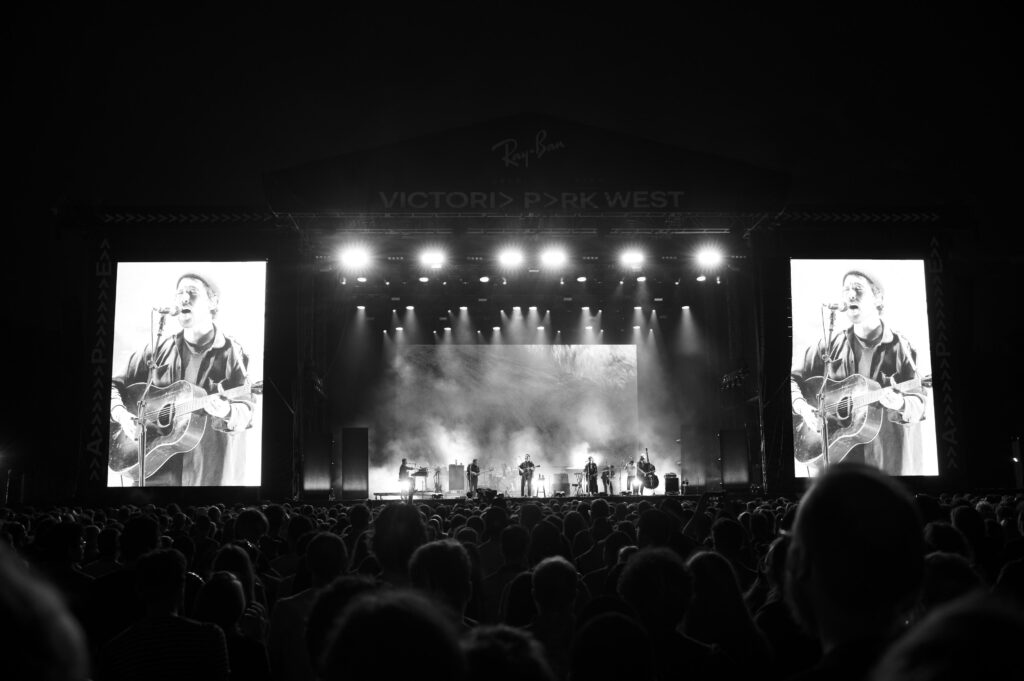
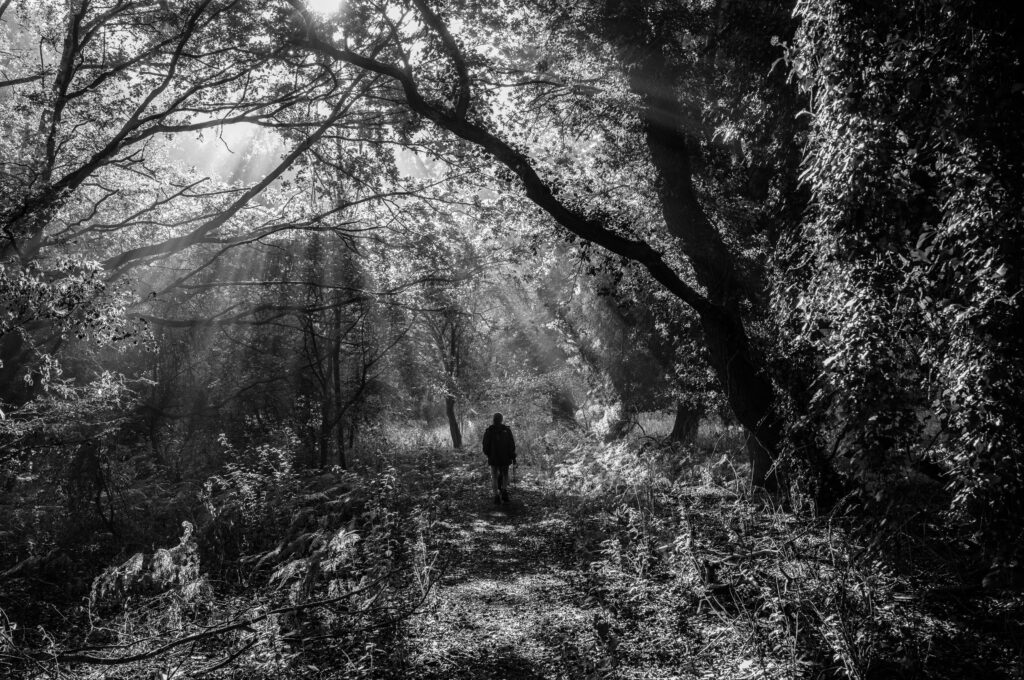
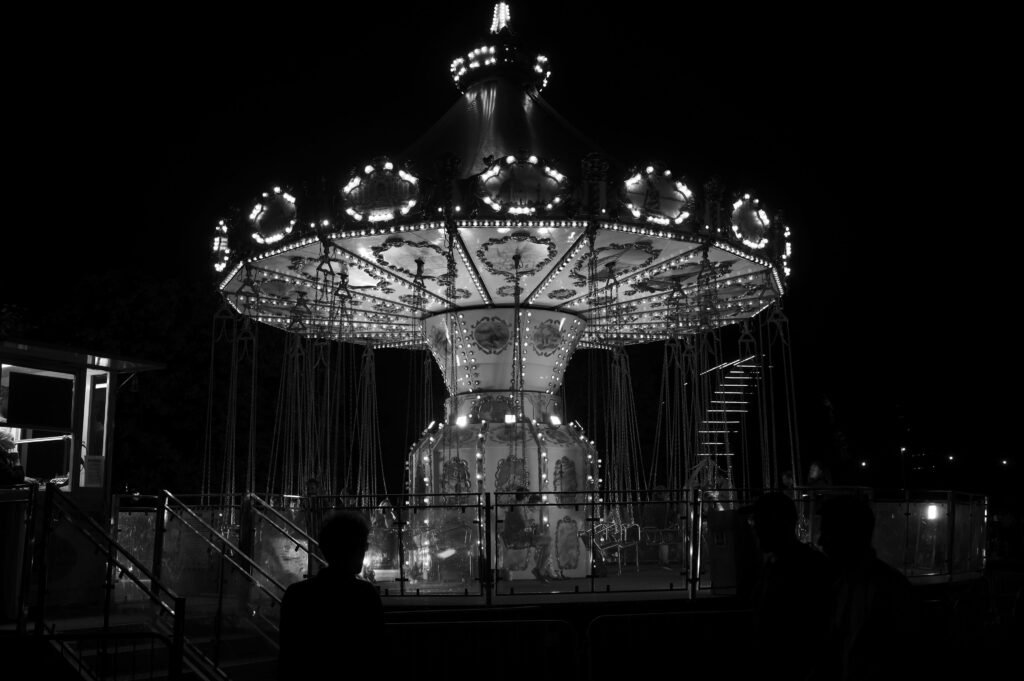
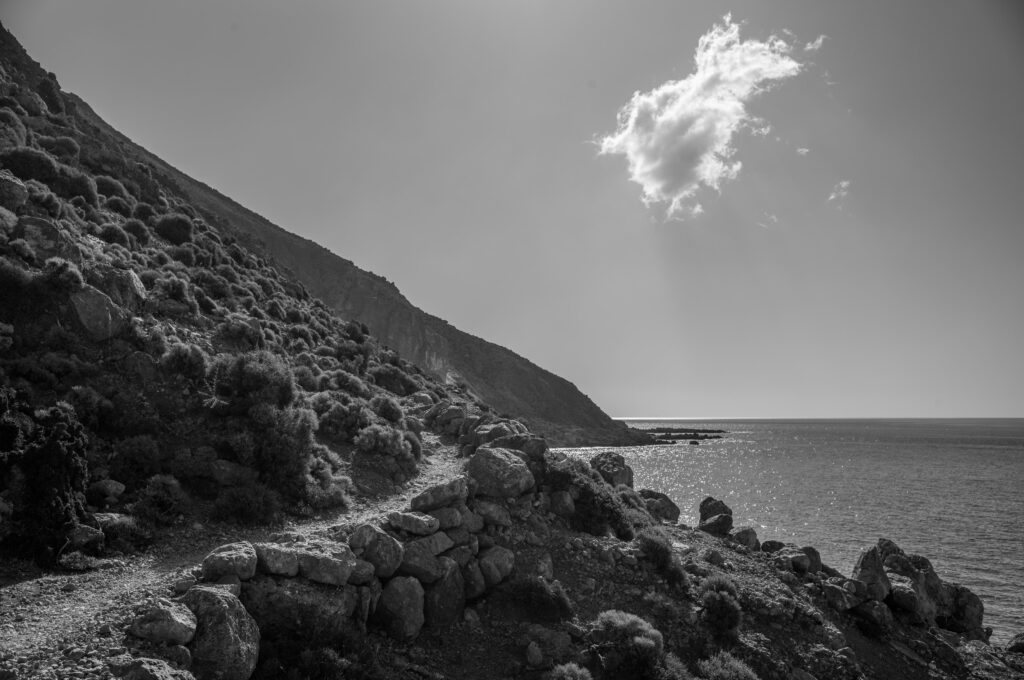
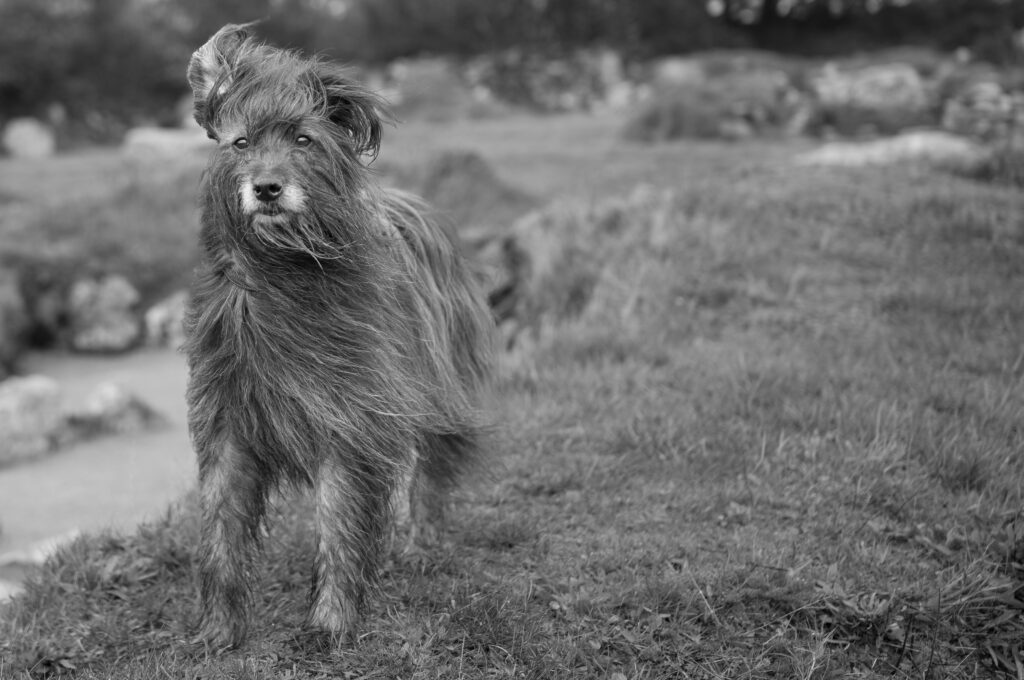
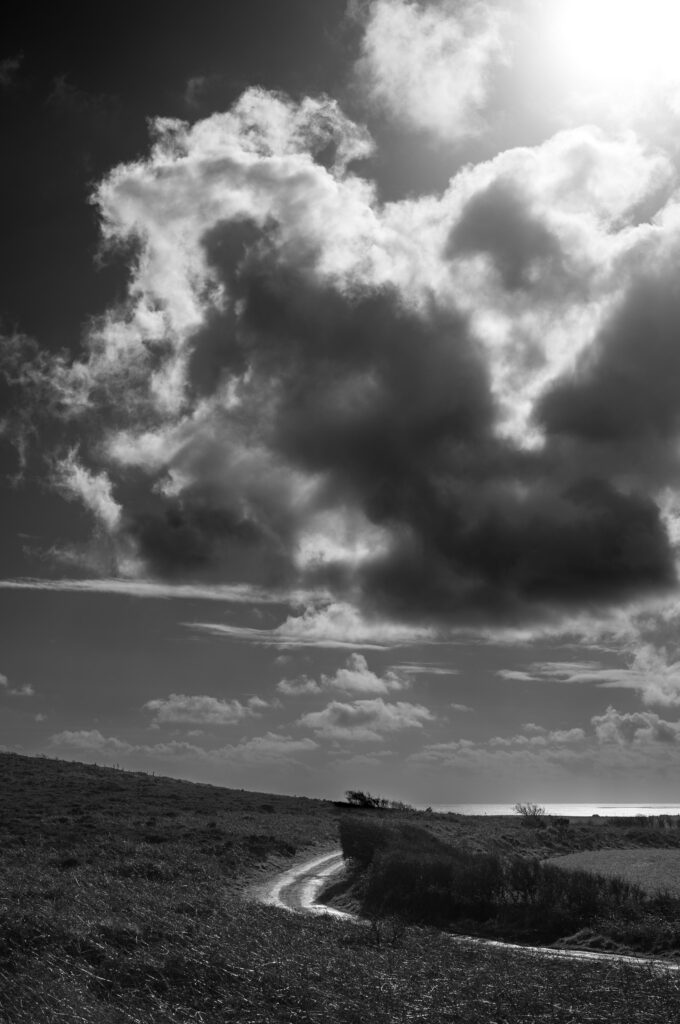
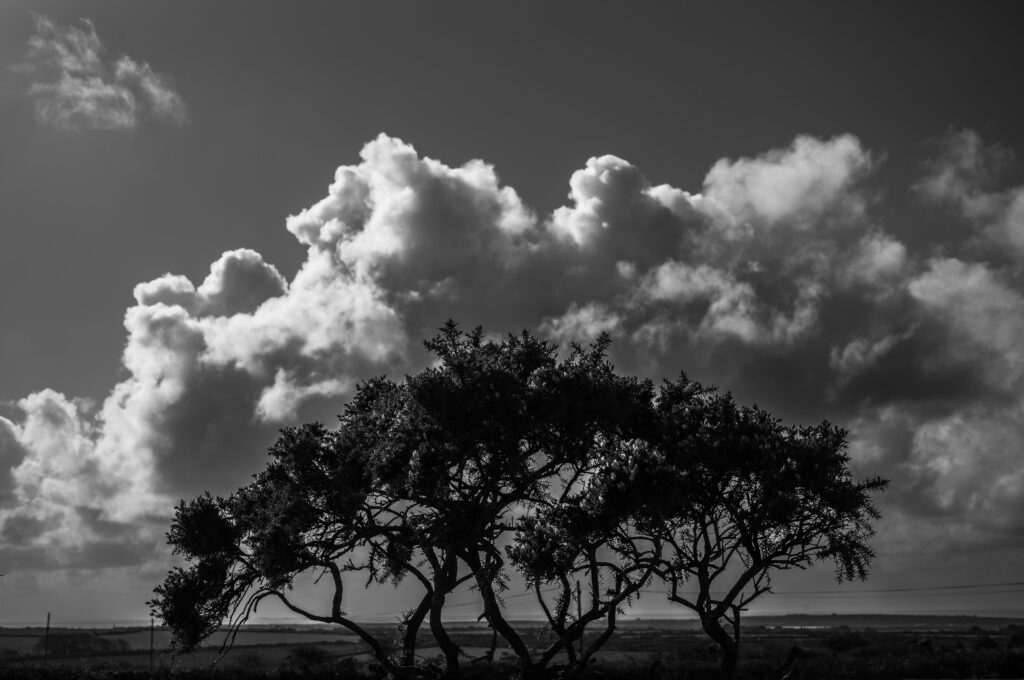
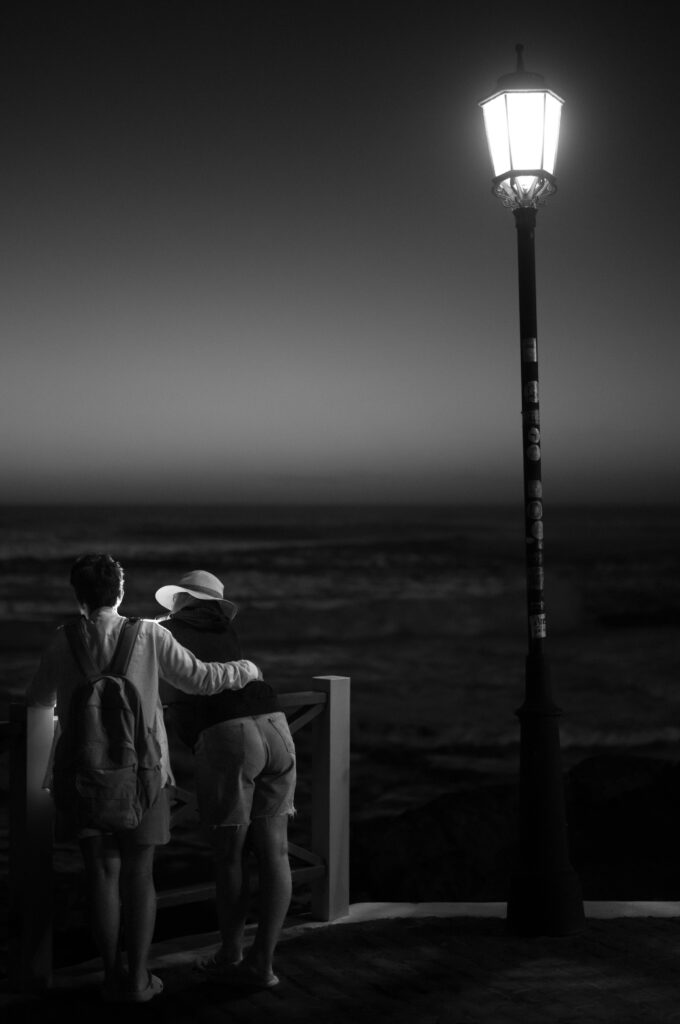
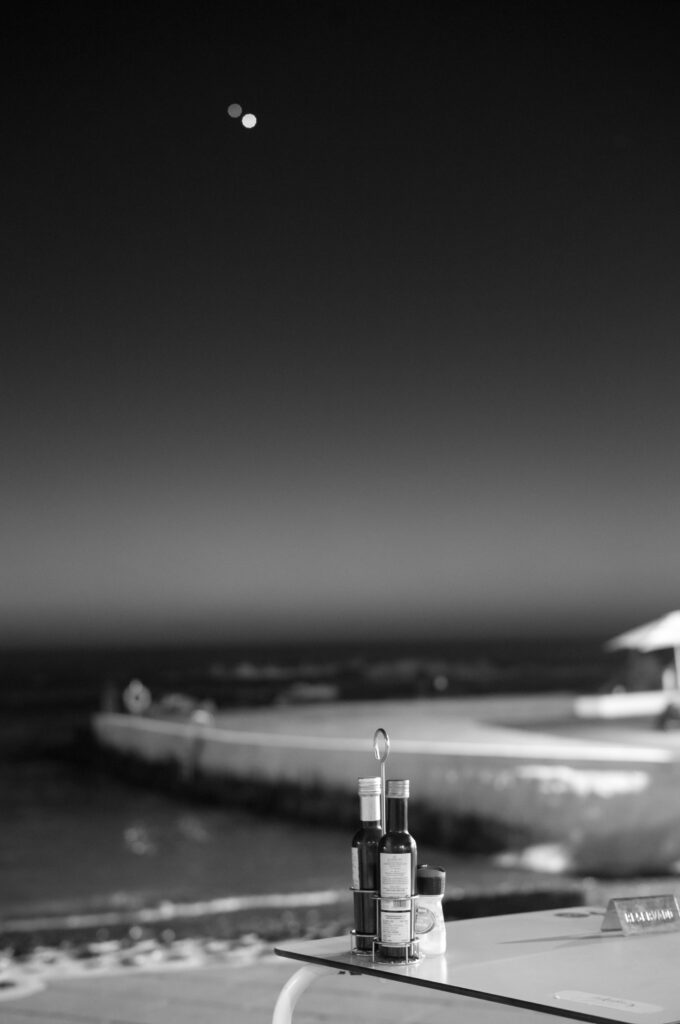
I always shoot DNG, and then process the images in Lightroom, all of these images have been processed one way or another, mostly by exposure and contrast adjustments and by cropping
When I chose the images to go with the article, I did not zoom in to see if they were sharp, had motion blur, or were out of focus. I chose them because I like them, not because they are technically good. Obviously, I do my best to make every image technically good, but I don’t let that get in the way of a good photo!
Acknowledgements
First of all I’d like to thank Emma, who puts up with my anguish about getting these articles right, and my staying up late to get them done.
The guys at Leica are wonderfully helpful. In this case, Christoph Mueller has been the patient star, but I’d also like to thank Murat Akkas, Jesko Oeynhausen and Stefan Daniel for being helpful and delightful. Not just for being helpful to me but for their real commitment to bringing the best possible camera to market.
I’d also like to thank all the crew at the Leica User Forum Beta forum – you know who you are! Also to Leon Baumgardt and Andreas Jurgensen at LUF.
Links
Here is a link to my article on the new 50mm Summilux Asph Close Focus
My Friend Chats has written a review of the M11 Monochrom
My old friend Sean Reid at (reidreviews.com) will publish a series of articles starting today.
It is a pay site but well worth taking a look.
This is what he has planned:
Today he has published his field review of the M11M and it is the first in a series of articles which will cover:
- Studio tests comparing the M11M, M10M and M11 at various ISO levels (and various DNG size settings)
- Studio tests comparing resolution and vignetting of the M11M, M10M and M11 with two 35 mm lenses
- Studio tests comparing resolution and vignetting of the M11M, M10M and M11 with a challenging 28 mm lens and a challenging 21 mm lens
- Theatre photography with the M11M
- Tests of the M11M’s response to various colour filters (which are designed to alter tonality)
- Studio tests comparing highlight headroom and apparent native ISO of the M11M, M10M and M11″
More images here
Read more articles and reviews by the author on Macfilos
Want to contribute an article to Macfilos? It’s easy. Just click the “Write for Us” button. We’ll help with the writing and guide you through the process.























Hi Jono,
As has been said many times, a great review. I actually read this when you first published it but reading it again seems even more poignant as I’ve spent almost the last whole year shooting black & white film.
I’ve really come to love the tonality of pure mono, in my case film which has its own magic, so I get it.
A good friend of mine shoots exclusively mono with an M10M and Q2M and I’m starting to think about my next year long project. I might finally see my first mono digital camera.
I’d never be without my trusty M11 or any other of my colour cameras for that matter but I’m edging closer to getting to properly know one with an ‘M’ suffix. This is in part due to this article and no small amout of my mate waxing lyrical about mono and churning out some excellent photos as well.
I look forward to meeting you properly in October at Wetzlar.
Beautiful shots that make the Mono come alive. As someone else noted before, I never quite felt the appeal of the Mono but your images make a lot of sense. Great read!
As usual u continue knock my eyeballs backward, u do these reviews so beautifully we r there with you! It’s too bad you don’t charge them because then I would say we can stone Pentax Ricoh to hire you and review their new mono. I don’t know why but I can see a lot of CL DX people gravitating there for this camera. Maybe that’s next article, get a loaner from them for comparison. Anyway thank you again!
Hi There John
Thanks for the kind words – I’m glad you enjoy the articles.
As for the Pentax – it’s very exciting, and I’m almost tempted to ask the for a loaner to put it through it’s paces.
Interesting thought!
best
Jono
Hi Jono, I used to own the amazing M10M. The image files were breathtaking. Incredible tonality, detail, and high iso/low noise abilities. I could shoot amazing f/8 images in low light forest conditions without a tripod. I sold it after I purchased the superb M11 because the M11 files were an adequate B&W conversion as I planned to upgrade to the sooner than usual M11M and I needed funds for things like the jaw dropping M 90/1.5. I used to think the 90/1.5 was stupid until I saw images and have actually used one.
I also own and love the SL2-S but still prefer the M experience when it suits. I find using a rangefinder puts me into a more deliberate mindset which always improves my performance. Similarly, the M10M put me into an even deepened mindset for taking images: texture, and so on. I also kept a yellow filter on the lens and switched to orange or red if appropriate. With the M11M, my past lusting days for a large format camera are now evaporated.
There are many people that think that you can get the same high quality image from a colour conversion but my experience contradicts that and the differences cannot be seen on web jpeg files. However, if you are satisfied with conversions from colour that is fine.
As a matter of interest, I used to own the SL2 and the SL2-S but sold the SL2 as the noise characteristics of the SL2-S were amazing. I just upsize the filed with Topaz gigapixel software for selling large images. So the most expensive camera or lens is not necessarily the best choice in my experience
Fundamentally, the rangefinder experience is an unique one and has to be tried for a few months before deciding whether it is right for you. A used rangefinder can be an “enlightening” experience. My first rangefinder was an M4P and I regretted selling it for an autofocus camera.
I expect the M11M to further “sharpen” 😅 my photography technique skills such as holding the camera still.
Hi There Brian
I think monochrome files have something special to them as well, my problem is that I very rarely know whether I’ll want Monochrom or colour, I could have two cameras all the time (like I have for the last 8 months) but it isn’t ideal.
Good luck with your M11M – I hope you don’t have to wait too long! It’s a lovely thing, and I’m going to be very sad to part with ‘mine’!
best
Well, that is superb. All I need to know and a bit more. Such a blessing to dispense with trawling the tedious reviews elsewhere. Your positive response to the new evf on the M11 M is not doing much for my itch re this camera. I tried the new evf atop the M10M and was very disappointed but the itch went away. I appreciate this is close to heresy but the calibre of the evf is important to those who are partial to a mono only sensor but admit defeat half the time when trying to focus via the RF. Selfishly, I was hoping you had been keeping an SL2M in your bag for eight months in which case the itch would be scratched. Looking at your sumptuous gallery I’m going to be itching as if bitten by a plague of voracious highland midges. A review with captivating shots is never to be underestimated. It remains the exception to the rule in online reviews that shooting a garden fence or a bus stop is a way to yield a sample gallery.
Although you can put the new Visoflex 2 (for the M11) onto the older M10, you still get only the M10’s original 2.4MP view, rather than the 3.68MP which the M11 can provide. (And you get it in a smaller central area of the finder.)
So using the new, rectangular, 3.68 megapixel M11 Visoflex on the older M10, you get no higher resolution than the (confusing names, huh?) Visoflex 002 provides. The V2 is mechanically ‘compatible’ with the M10; it doesn’t, though, give a higher resolution than the V002 when used on the M10. Sorry.
Hi There Darrell
I think the EVF is important as well, particularly with the Monochrom, as for the SL2M, I think it was a very close call, but I haven’t been told about one.
As David says – the new Visoflex works on the M10 – but only in ‘crop’ mode, I didn’t think it was as good as the Visoflex 1 really.
Thank you for the kind words – much appreciated and it makes the work worthwhile
all the best
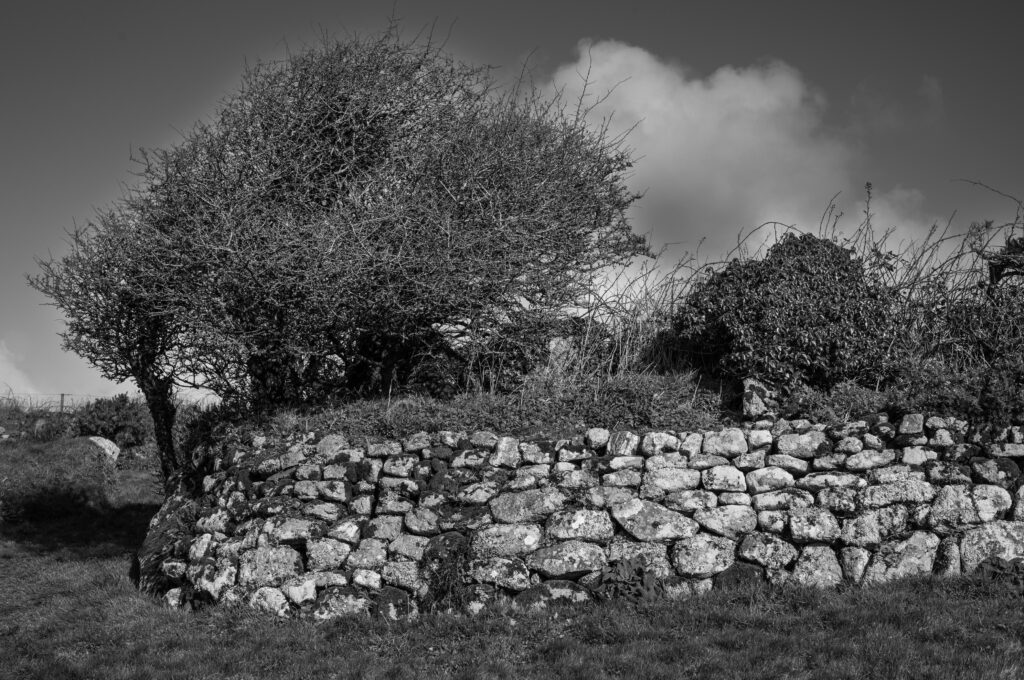
Hi Jonathan, thank you! Really enjoyed the article. I am not a Leica rangefinder user, but I do own a Q2 Monochrom, which I love. I still find the experience of looking through the viewfinder and seeing the world in black and white a real thrill. Since you did not mention it in any of your captions, I assume that you did not use any color filters for your outdoor shots, particularly those that include sky and clouds. Is that correct? Whatever your approach, those images look terrific. I am still experimenting with use of color filters on my Q2. It is adding another, interesting technical dimension to shooting with a dedicated B&W camera. All the best, Keith
Hi there Keith – I’m pleased that you enjoyed it, it really is the intention – and if I can interest someone who is not interested in the camera, then I’ve really succeeded!
I did use filters some of the time, but I’m much too scatty to remember where and when! If I shoot film I always use the same lens and filter for the whole roll, but with digital it’s too hard to remember.
But the later shots are without filters, because I felt that I could mostly do what I wanted in Lightroom anyway. . . .
all the best
Jonathan
Thanks, Jono, for another excellent review with wonderful images. For me, your articles about photographic devices are a gold standard I want to reach with my own work. You are passionate but not obsessive, with a good sense or humor and a keen eye for situations that can take a camera or a lens to its limits. And despite being a Leica beta tester, you are obviously not a fanboy. This is what I would call real independence. Chapeau. JP
Thank you so much Jörg-Peter
Every time I start a new article I think “I’ll look at the last one to get a sequence” . . . then I don’t. I like to think it’s because I want each one to be fresh, but it’s probably just because I’m too lazy!
It’s still fun after nearly 15 years doing it. I don’t think you can be a fanboy and a serious camera tester – it wouldn’t really work – I am an enthusiast though, but I really am independent, and I could walk away at any moment if I got bored!
Anyway – thanks for the kind words – it makes it all worthwhile.
best
Jono
Very nice and thorough review, thanks.
Thank you Thorsten
Hi, My M246 bands too much if I need to lift the shadows so I’m hoping this release might knock the M10m price down a bit and I can swap to that.
The M10m shutter sounds lovely, the M11 sounds like junk to me and always sounds like there is lag even if there isn’t.
Great review.
All the best, Mark
Hi There Mark
I did all my testing in natural light (sometimes very dark natural light ) I can honestly say that I didn’t see ANY banding, although Sean Reid does his tests in artificial light because the blue channel is harder and tends to cause banding – he says he has managed some, but it’s still very good.
You get used to the shutter noise, but I completely agree with you about it, for me it’s the only real downside of the M11 family so far (and you better believe I’ve told Leica about this over and over again!).
All the best
Jono
I just thought of another downside, which Jono and I discussed some time ago in relation to the M11: the lack of any (artificial) shutter noise option when using the electronic shutter. When the shutter is set to hybrid, you can be caught out between two shots — one, under 1/4000s, gives a resounding clonk while the next press, over 1/1400s, appears to do nothing. I’ve been caught out several times, wondering if something has happened. As Jonathan said when we last mentioned it, there isn’t a speaker in the camera (or so we think), so this is a hardware omission (difficult to change) and not something a firmware update could rectify. So we probably have to live with it.
I think this is the best article ever but then I love black and white since the film days. This article confirms my preorder that was placed before the announcement.
Thanks for all your efforts in writing a comprehensive practical review of this camera.
I am not enamoured with the screw being visible with the missing Leica logo. I will have to decide whether I use an aftermarket Leica sticker to cover the screw head.
Ah, the screw! I’m not so sure I mind much either way.
I’m glad you enjoyed it though – that was my intention (hope!)
All the best
Jono
Hasn’t the naked screw been a feature of some previous cameras? I hope you get your M11M soon… I hear that dealers have them in stock today. Red Dot had seven for the lucky pre-orderers.
My M10-P has the ‘naked screw’ (..wasn’t that a film with Leslie Nielsen?)
(I prefer that to the red dot ..I had Leica change the red dot on my M9 to the BLACK dot of the 8.2.)
Same here. Also prefer it to the red dot
Hi, I wonder if Leica would sell a black dot as an accessory for the owner to apply. I would love a black Leica dot with the Leica logo in a dark grey. I would love one.
Brian: just ask them!
I bought two M8.2 black dots from them, so that if ever the dot was taken off the M9 – for emergency rangefinder re-alignment by someone other than Leica – I’d have at least one spare to cover the bare screw-hole afterwards.
Or do what I’ve done with others: use a black felt-tip pen (or paint) to change the red dot to black. Simples! ..On the M4-P, for instance, with that big red ‘Leitz’ dot: just paint it out if you don’t like it!
(I improved the awful exposure variation on the M9 – when held vertically, and the sun or sky was being read by the metering – simply by black felt-tipping down the left and right edges of the white shutter segments. Perfect exposure after that! Cost of the ‘repair’ or adjustment? ..about 80 pence, or whatever a felt-tip pen costs.)
Hi David, thanks for your suggestions. I found a past Leica made black dot for sale by an owner who stated that he had purchased a spare from Leica but no longer needed it. He also pointed out that Leica no longer sells them. He also sold it for $100. You have more value than you may realize in your inventory
I am considering painting one. However, I did find a vendor on Etsy that sells black metal ones but they are out of stock at the moment.
Having served my time watching YouTube reviews, it is so refreshing to read a quiet, thorough and highly professional review.
I should also mention that I generally don’t ‘get’ monochrome but yours are lovely; just glancing grabbed my eyes and made me want more.
Thank you so much Kathy – it’s really appreciated, I do try hard!
I think the trouble with most YouTube reviews (and websites sometimes as well) is the purpose is to make money – so you need to keep people hanging on for as long as possible so they see all the adds.
Plus you want to be sensational, because it gets you more clicks.
Because Michael is such a skinflint I don’t have any of this motivation, so I might as well tell it as I see it!
Seriously – I studiously avoid making any money from the articles (my son thinks I’m crazy), because I do want to try and stay straightforward.
Thanks again
Jono
I was very interested in your comments about YouTube reviews. It seems parallel to the way news shows have become ‘infotainment.’
Another issue: I believe a camera review should show us the quality of photographs produced. I’ve yet to see a video that allows me to linger over a photo, to think about it, to be astounded by it, even to simply enjoy it — all of which I did with those in your review.
You are very astute. You will never see a photo on the youtube reviews to provide support for their “competence”. The real proof is in the images they produce. You will never see it. I generally do not watch youtube reviews for photography as they have no real value and one cannot trust their viewpoint. Often they have not even used the equipment at all or have not used it for an extended period or are not even accomplished photographers.
Dear Kathy
now I feel even better about it. It’s really the photos that I care about. It may seem a funny way to stimulate one’s creative juices, but for me, a new camera to test gets me out and thinking again. . . . but if you’re thinking about my pictures then I’m a happy man!
I do think the ‘review business’ is very much like the way news shows have become ‘infotainment’. Everybody has mixed motives . . In honesty I suppose I do as well, but none of them is to mislead people!
I think we’re agreed on the ‘value’ of YouTube, but I also don’t want to tar everyone with the same brush(if I have that saying right!).
Thorsten of course is serious, and gives some very good advice: Get out of your house and take photos!
Alex Kilbee’s The Photographic Eye is also good for newbies like myself, who can benefit from seeing what well-known photographers have done.
Hi Kathy, I wish I had a fraction of Thorsten’s talent and skill – especially capturing images with a rangefinder. I have most of his educational material which was and is valuable for me. He is both inspiring to prod one to be better and provides the education to better yourself if you actually put the new knowledge into practice- practice, practice, practice…
My comment on youtube is based on the majority of “experts “ which is similar for most of the blogs. I was shocked when an fstoppers author actually posted an article stating that his equipment reviews do not point out issues and promote the purchase or he would not get free equipment to review. It was obvious to me but was surprised that he did not see a problem with this as everyone does it! I feel sorry for all the people mislead by these people. However, I can place my trust in Jono. Thorsten, Sean Reid, and a very few others.